Debian
Na tej podstrani zbiram ukaze in primere konfiguracijskih datotek (programov) operacijskega sistema Debian GNU/Linux, ki se mi zdijo uporabni.
Nekateri ukazi zaradi morebitne zastarelosti, neposodobitve ali ukinitve ne bodo več delovali.
Namestitev
Trenutno različico, pri kateri se (skoraj vsi) dodatni programi (v obliki paketov) prenesejo s spleta, je mogoče najti na naslovu www.debian.org/distrib/netinst.
Slike zgoščenk starejših različic se hranijo na strani cdimage.debian.org, arhiv paketov starejših različic pa na naslovu archive.debian.org.
After installation
Package management
Remove some packages after default jessie installation:
apt-get remove --purge -y man-db manpages vim-common vim-tiny
apt-get remove --purge -y dictionaries-common emacsen-common iamerican ibritish ienglish-common ispell task-english wamerican
apt-get remove --purge -y discover discover-data gcc-4.8-base libexpat1 tasksel tasksel-data
apt-get remove --purge -y laptop-detect installation-report
apt-get autoremove --purge -y
Prevent recommended and suggested packages to be installed automatically
cat <<EOF >/etc/apt/apt.conf.d/01norecommend
APT::Install-Recommends "0";
APT::Install-Suggests "0";
EOF
Prevent apt-get from fetching diffs of repository
echo 'Acquire::PDiffs "false";' >/etc/apt/apt.conf.d/02nodiffs
Ignore translation packages
echo 'Acquire::Languages "0";' >/etc/apt/apt.conf.d/99no-translation
Speed up system
Enable /tmp as tmpfs
systemctl enable tmp.mount
or
sed -i -r "s/^#(RAMTMP=)no/\1yes/" /etc/default/tmpfs
Decrease GRUB waiting time
sed -i -r 's/(GRUB_TIMEOUT=)[0-9]/\11/i' /etc/default/grub
Set system specific details
Set network configuration with static IP
sed -i -r 's/(iface eth0 inet )dhcp/\1static\n address 10.82.4.18\n netmask 255.255.255.224\n network 10.82.4.0\n broadcast 10.82.4.31\n gateway 10.82.4.1/' /etc/network/interfaces
Remove message of the day
> /etc/motd
Remove VTs (getty on tty2-tty6) if using systemd
systemctl mask getty-static.service
sysv
sed -i "/^[2-6]/s/^/#/" /etc/inittab
Replace systemd with sysv
Nadgraditev
Update the system from jessie release to stretch
sed -i "s/jessie/stretch/g" /etc/apt/sources.list
Update the system from wheezy release to jessie release
sed -i 's/wheezy/jessie/g' /etc/apt/sources.list
[ -x /usr/bin/apt-get ] && /usr/bin/apt-get update
Zvočni sistem
ALSA
Za snemanje in predvajanje v konzoli so na voljo orodja v paketu
alsa-tools.
arecord -f cd -t raw | oggenc - -r -q 8 -o out.ogg- snemanje v formatu OGG/Vorbis (potrebuje se paket vorbis-tools)
wget http://server/track1.mp3 -O -|madplay - -o wave:-|aplay -D hw:1,1 -
modprobe snd-aloop index=1 pcm_substreams=1
arecord -f cd -D hw:1,0 |netcat 10.82.4.60 4455

netcat -l -p 4455|aplay -f cd -
Pulseaudio
Remote PA server
1,
2,
3,
4,
5
Pred pred module-hal-detect se vpiše
load-module module-alsa-sink control=Master in na konec doda
load-module module-native-protocol-tcp auth-ip-acl=127.0.0.1;10.82.4.0/27
load-module module-zeroconf-publish
kjer je 10.82.4.0/27 domače omrežje.
Omrežje
ipv4
iface eth0 inet static
  address 10.82.4.12
  netmask 255.255.255.224
  network 10.82.4.0
  broadcast 10.82.4.31
  gateway 10.82.4.1
ipv6
Primer ročne konfiguracije za edis.at KVM strežnik.
iface eth0 inet6 static
  address 2a03:f80:ed15:149:154:153:154:1
  netmask 32
  gateway 2a03:f80:ed15::1
  dns-nameservers 2001:4860:4860::8888 2001:4860:4860::8844
nic bonding
Primer nastavitve za vzporedne povezave LACP, ki jo mora podpirati tudi omrežno stikalo.
Na sistemu je potreben paket ifenslave, kar namestimo z ukazom apt-get install ifenslave. V
/etc/modules.d/ moramo dodati
options
auto bond0
iface bond0 inet static
  address 10.82.4.15
  netmask 255.255.255.224
  network 10.82.4.0
  broadcast 10.82.4.31
  gateway 10.82.4.1
  bond_mode 802.3ad
  bond_miimon 100
  bond_lacp_rate fast
  slaves eth1 eth2
vlan
apt-get install vlan
auto eth0 vlan1 vlan2 vlan4 vlan5 vlan10

iface vlan1 inet static
	address 192.168.4.82
	netmask 255.255.255.0
	network 192.168.4.0
	vlan_raw_device eth0

iface vlan2 inet static
	address 172.16.4.139
	netmask 255.255.255.240
	network 172.16.4.128
	gateway 172.16.4.129
	vlan_raw_device eth0

iface vlan4 inet static
	address 10.82.4.13
	netmask 255.255.255.224
	network 10.82.4.0
	vlan_raw_device eth0

iface vlan5 inet static
	address 10.82.4.33
	netmask 255.255.255.224
	network 10.82.4.32
	vlan_raw_device eth0

iface vlan10 inet static
	address 192.168.1.2
	netmask 255.255.255.0
	network 192.168.1.0
	vlan_raw_device eth0
wlan
apt-get install crda iw
iw reg set SI
ip link set dev wlan0 up
iw dev wlan0 scan
Primeri ukazov
iwlist wlan0 scan- poišče vsa brezžicna omrežja na vmesniku wlan0
ifconfig wlan0 down
iwconfig wlan0 mode ad-hoc essid open.wlan-si.net
ifconfig wlan0 up
- priklop v wlan-si omrežje
Brezžično omrežje z WPA ključem
Potrebno je namestiti paket
wpasupplicant in v datoteko /etc/network/interfaces dodati:
auto wlan0
iface wlan0 inet dhcp
  wpa-ssid wirelessssid
  wpa-psk mysecretwifipasswd
Brezžično omrežje ad-hoc
auto wlan0
iface wlan0 inet dhcp
  wireless-essid open.wlan-si.net
  wireless-mode ad-hoc
Strežniške aplikacije
Poštni sistem postfix
Navodila (ISPmail) za
namestitev postfix, dovecot, roundcube, mysql, amavis, clam, spamassassin. Dober
je tudi ta za Gentoo.
Če se SMTP ne oglaša na ipv6, je v main.cf potrebno
nastaviti inet_protocols = all.
dnsmasq (dns & dhcp server)
BIND (dns server)
/etc/bind/named.conf.local
acl "servers" {
  10.154.3.4;
  10.238.6.1;
  ff03:f0:e15:14:54:53:4:1;
  ff01:1f0:c00:811::64;
};
zone "rs.si" {
  type master;
  file "/etc/bind/zones/rs_si";
  allow-update { none; };
  allow-transfer { "servers"; };
  notify yes;
};
Podpora za ipv6 se omogoči tako, da se v datoteko
/etc/bind/named.conf.options dopiše listen-on-v6 { any; };.
mysql (podatkovna baza mySQL)
CREATE DATABASE db;- ustvari podatkovno bazo db
GRANT ALL PRIVILEGES ON db.* TO 'newuser'@'localhost' IDENTIFIED BY 'pass';- dodeljevanje vseh pravic za podatkovno zbirko db k novemu uporabniku newuser
apache (web server)
Redirect from www to non-www domain
RewriteEngine On

RewriteCond %{HTTP_HOST} ^www\.example\.com [NC]
RewriteRule ^(.*)$ http://example.com/$1 [R=301,L]
After upgrading Apache to version 2.4 in Directory segment replace
Order Allow,Deny
Allow from all
Require all granted
lighttpd (spletni strežnik)
Ime paketa: lighttpd, nastavitve: /etc/lighttpd/lighttpd.conf.
php support
Za PHP5 podporo je potrebno namestiti paket php5-cgi
aptitude install php5-cgi. Nato pa
nakar servis ponovno zaženemo service lighttpd restart.
ssl
To create a .pem file that lighttpd can use, concatenate your key and certificate:
cat testing.key testing.crt > certificate.pem
To server only ssl:
alpinelinux lighttpd
redirect everything to https
$HTTP["scheme"] == "http" {
    $HTTP["host"] =~ ".*" {
        url.redirect = (".*" => "https://%0$0")
    }
}
Samba
Install the packages and all the dependencies:
aptitude install samba samba-clients samba-vfs-modules attr
Now we build the Active Directory
mv /etc/samba/smb.conf /root/
samba-tool domain provision --use-rfc2307 --interactive --use-xattrs=yes
[ -f /var/lib/samba/private/sam.ldb ]
Sistem
autologin
Normally, when you just install a plain base system you usually boot
to a login prompt and after you enter your username and password you get
the shell prompt. Now suppose we want to bypass the step where we enter
username and password. How do we do that?
The first step is to install the a program called mingetty which we
will use instead of the regular „getty“ which is responsible for
generating the usual login console.
aptitude install mingetty
Edit the inittab file /etc/inittab and replace
2:23:respawn:/sbin/getty 38400 tty2
with 2:23:respawn:/sbin/mingetty --autologin root --noclear tty2
Serial console
By introducing systemd as default init system for Debian, command prompt on console (serial) doesn't work anymore.
The solution is simple, fix /lib/systemd/system/serial-getty@.service by simple sed command.
sed -i "/ExecStart/s/--keep-baud/-L %I/;s/,38400,9600 %I//" /lib/systemd/system/serial-getty@.service
sed -i "/ttyS0/{s/^#//;s/9600/115200/}" /etc/inittab
syslogd
Sledeče onemogoči izpisovanje „MARK“ sporočil: /etc/default/syslogd
SYSLOGD="-m 0"
hdparm
/etc/hdparm.conf (hdparm at Jaunty startup)
/dev/sda {
	apm = 127
	spindown_time = 12
}
shm
/etc/default/rcS
RAMRUN=yes
RAMLOCK=yes
udev
Get attributes
udevadm info --name=/dev/video0 --attribute-walk or udevadm info -a -p $(udevadm info -q path -n /dev/video0)
/etc/udev/rules.d/20-video.conf
KERNEL=="video[0-9]*",SUBSYSTEM=="video4linux",ATTRS{device}=="0x7133",SYMLINK+="saa7133"
KERNEL=="video[0-9]*",SUBSYSTEM=="video4linux",ATTRS{device}=="0x036e",SYMLINK+="bt878"
Reboot and test rules
udevadm control --reload-rules
udevadm test -a -p  $(udevadm info -q path -n /dev/video0)
Delo s podatki
mrežni datotečni sistem
Priklop mrežnega diska preko cifs protokola kot gost, potreben paket cifs-utils
mount -t cifs -o guest //wopr/share /mnt/share
cut /etc/passwd -d: -f1,3- Izpiši prvo in tretje polje datoteke /etc/passwd, kjer so polja ločena z :
du -h -s mapa- Izpiši velikost mape mapa
du -h -d 1- Izpiši velikosti prvih podmap trenutne mape
stat file- Izpiši podrobnosti datoteke file
jfs_fsck /dev/sdb1- Počisti JFS datotečni sistem, v kolikor ga ni mogoče priklopiti
dmsetup remove --force /dev/mapper/lun0- Remove unavailable (zombie) volume (missing physical volume)
echo 1 > /sys/block/sdb/device/delete- Remove hard drive node file
/dev/sdb from system
Formatiranje diska in izpis UUID
mkfs.ext4 /dev/vdb
blkid
oznake (tag)
Za odstranitev metapodatkov multimedijskih formatov se uporabi ukaze
vorbiscomment -c /dev/null -w audio.ogg (v paketu vorbis-tools) oziromaid3v2 -D audio.mp3 za format mp3 (v paketu id3v2).
mdadm RAID
mdadm --create --verbose /dev/md/2 --level=raid6 --chunk=512 --raid-devices=6 --spare-devices=0 /dev/sd{a,b,c,d,e,f}2- stvaritev polja raid 6 iz šestih particij
mdadm --fail /dev/md/2 /dev/sdc1- sprožitev izpada diska
mdadm --remove /dev/md/2 /dev/sdc1- odstranitev izpadnega diska
mdadm --add /dev/md/2 /dev/sdc1- dodajanje diska
mdadm --readwrite /dev/md1- fix auto-read-only status
SCSI
dmesg output of an old server ~ 1990
Configuring Adaptec (SCSI-ID 7) at IO:330, IRQ 11, DMA priority 5
scsi0 : Adaptec 1542
  Vendor: FUJITSU   Model: M2266S-512        Rev: 002C
  Type:   Direct-Access                      ANSI SCSI revision: 02
Attached scsi disk sda at scsi0, channel 0, id 0, lun 0
SCSI device sda: 2107704 512-byte hdwr sectors (1079 MB)
Partition check:
 /dev/scsi/host0/bus0/target0/lun0: p1 p2
arhivi
tar -xJf arch.tar.xz- Razširi vsebino arhiva arch.tar.xz, zapisanega v obliki xz
7z x arch.7z -ofolder- Razširi vsebino arhiva arch.7z, 7z-arhiv, v mapo folder
unzip file.zip -d folder- Razširi vsebino arhiva file.zip v mapo folder
zip -r file.zip folder/- Stistni mapo folder v zip-arhiv file.zip
for i in *.zip; do
  unzip "$i" -d "$(echo $i | sed -r 's/(.zip|.7z)*$//')/"
done
for i in *.7z; do
  7z x "$i" -o"$(echo $i | sed -r 's/(.zip|.7z)*$//' | sed -n 's/[^_]*_[0-9]*_//p')/"
done
kodne tabele
Pretvaranje dokumentov iz ene kodne table v drugo, primer: iz ISO-8859-1 v UTF-8
iconv -f ISO8859-1 -t UTF8 index.html -o index2.htm
kopiranje
rsync -avP -e ssh * wopr:/home/jaka/incoming/
Console
Za spremembo resolucije v konzoli se uredi /etc/default/grub:
GRUB_GFXMODE=1024x768
GRUB_GFXPAYLOAD_LINUX=1024x768
Kernel compiling
Old way
apt-get install build-essential devscripts fakeroot kernel-package libfile-fcntllock-perl libncurses5-dev
Get kernel source or use apt-get source linux
Untar linux sources by tar -xJf linux-3.15.1.tar.xz and apply default configuration
make x86_64_defconfig
make menuconfig
To build kernel use fakeroot, enter
fakeroot make-kpkg --initrd --append-to-version=-falcon --revision=2 kernel_image
Download and untar in one line
wget https://www.kernel.org/pub/linux/kernel/v3.x/linux-3.18.1.tar.xz -O - |tar xJ
New way
Obtain packages:
apt-get install bc dpkg-dev gcc fakeroot libc6-dev libfile-fcntllock-perl
and build kernel package:
make deb-pkg LOCALVERSION=-cc KDEB_PKGVERSION=1
Ostalo
SSH
Ustvarjanje SSH ključa ssh-keygen -t rsa in kopiranje na
oddaljeni sistem ssh-copy-id remoteuser@remotesystem.
- Priklop oddaljenega sistema
sshfs remoteuser@remotesystem:/home/folder/ /remotefolder/ -o uid=102,allow_other
ssl
generate a new certificate request
openssl req -new -sha256 -key your-private.key -out your-domain.csr
makefile
string substitution,
conditionals,
quick reference
Ostalo ostalega
dpkg -l
setxkbmap -layout us
mkvmerge --title "Title" -o "Output.mkv" --language 0:eng --default-track 0:0 Subtitles.srt -a 3 --language 1:und --language 3:eng --default-track 3:1 Input.mkv
Check ssh service on port 22
nmap -sV --open -p 22 192.168.60.0/24
Enable colors in git output (usefull in git diff mode)
git config --global color.ui auto
motd
Generate ascii art here,
colors,
terminal codes
[user@box]$ echo -en "\033[1;34m" > /etc/motd
[user@box]$ echo "Text of your motd file....." >> /etc/motd
[user@box]$ echo -en "\033[0m" >> /etc/motd
Ubuntu
Namestitev
Za namestitev operacijskega sistema Ubuntu preko lokalne mreže in spleta si oglejte sledeče povezave:
Paket mrežne namestitve veje Jaunty dobite na Ubuntu
archive. Ostali so dostopni na http://cdimage.ubuntu.com/netboot/
Video sistem V4L
Večina dokumentacije se nahaja na uradni strani V4L.
Trenutno uporabljam PCI DVB-T sprejemnik HVR 1120, ki je podprt v Ubuntu različici Lucid Lynx. Gonilnike sem namestil z
mkdir /root/hvr1120/
cd /root/hvr1120/
wget http://steventoth.net/linux/hvr1200/HVR-12x0-14x0-17x0_1_25_25271_WHQL.zip
wget http://steventoth.net/linux/hvr1200/extract.sh
apt-get install unzip
sh extract.sh
mv v4l-cx23885-enc.fw /lib/firmware
mv v4l-cx23885-avcore-01.fw /lib/firmware
mv dvb-fe-tda10048-1.0.fw /lib/firmware
Uporaba:
mencoder tv:// -tv driver=v4l2:device=/dev/video0:input=1:norm=pal:width=720:height=576:alsa:adevice=hw.0,0:forceaudio:buffersize=64 -noskip -of avi -ofps 25 -aspect 4:3 -ovc raw -oac pcm -o /home/tv_$(date +%Y.%m.%d_%H%M%S).avi- snemanje iz RCA oziroma Line in vhoda v raw oziroma pcm formatu
-
amixer -c 0 sset 'Capture',0 35%,35% cap
amixer -c 0 sset 'Capture',1 0%,0% nocap
amixer -c 0 sset 'Input Source',0 'Line'
mencoder tv:// -tv driver=v4l2:device=/dev/video0:input=1:norm=pal:width=720:height=576:outfmt=bgr24:alsa:adevice=hw.0,0:forceaudio:buffersize=64 -noskip -of avi -ofps 25 -aspect 4:3 -ovc lavc -lavcopts vcodec=ffv1 -oac pcm -af channels=1:1:0:0 -info srcform="video8" -o /home/tv_$(date +%Y.%m.%d_%H%M%S).avi -force-avi-aspect 4/3
-
- primer za presnemavanje videokaset, enokanalni zvok
dvb-t
Kanale (bolje rečeno programe) se poišče z ukazom
w_scan -c SI -C UTF-8 -X (iz paketa
w-scan, več podatkov v
dokumentaciji),
in se shranijo v datoteko channels.conf, kjer so navedeni
programi s frekvenco in pnr. Primer teh datotek:
leto 2015: channels.conf,
leto 2014: channels.conf,
leto 2012: channels.conf,
leto 2010: channels.conf.
Kakovost signala in motnje se preverijo z ukazom
tzap -r -c channels.conf "SLO3(RTV SLOVENIJA)" -a 0
iz paketa dvb-apps.
dvb-s
Astra
w_scan -fs -s S19E2 -R 0 -E 0 -C UTF-8 -X > astra_free.conf
dvb-c
Na „kabelski televiziji“ se kanale poišče z ukazom w_scan -fc -c SI -R 0 -C UTF-8 -X > channels.conf
Streaming
mkfifo /root/pipeline
mplayer tv:// -tv driver=v4l2:device=/dev/video0:input=1:norm=pal:width=720:height=576:noaudio -nosound -nolirc -noconsolecontrols -vo yuv4mpeg:file=/root/pipeline 2>&1 > /dev/null &
avconv -f yuv4mpegpipe -i /root/pipeline -c:v mpeg2video -b 2000k -an -aspect 4:3 -f mpegts udp://10.82.4.12:1234
avconv -f video4linux2 -channel 1 -video_size 640x480 -input_format yuv420p -i /dev/video0 -vf format=gray -c:v mpeg2video -b 1000k -r 25 -an -aspect 4:3 -f mpegts udp://10.82.4.6:1234
avconv -f video4linux2 -channel 1 -video_size 720x576 -input_format yuv420p -i /dev/video0 -c:v mpeg2video -b:v 1000k -r 25 -metadata service_provider="Webcam" -aspect 4:3 -f mpegts udp://10.82.4.26:1234 2>&-
xwindows
How to export DISPLAY as environment variable?
Usualy this is done by export DISPLAY=:0.0.
Moreover DISPLAY=:0means the first GPU in the system,
DISPLAY=:0.0 means the first configured screen, while
DISPLAY=:0.1 means the second configured screen in the system.
Gnome
Default keyboard shortcut to switch between desktops: Ctrl+Alt+Left (Right) Key
Gnome interface
Show icons on desktop
gsettings set org.gnome.desktop.background show-desktop-icons true
Move minimize, maximize and close button to right
gconftool --type string -s /apps/metacity/general/button_layout "menu:minimize,maximize,close"
gsettings set org.gnome.desktop.wm.preferences button-layout 'menu:minimize,maximize,close'
Change GTK theme
gsettings set org.gnome.desktop.interface gtk-theme 'Adwaita'
gconftool -s -t string /desktop/gnome/interface/gtk_theme "Ambiance"
Remove Emacs keybindings in Gnome
gsettings set org.gnome.desktop.interface gtk-key-theme Default
gconftool -s -t string /desktop/gnome/interface/gtk_key_theme "Default"
Set DMZ cursor theme
gsettings set org.gnome.desktop.interface cursor-theme 'DMZ-White'
Change Metacity theme
Install openSUSE Gilouche Theme aptitude install gnome-theme-gilouche and apply theme
gsettings set org.gnome.desktop.wm.preferences theme 'Gilouche'
gconftool-2 -s -t string /apps/metacity/general/theme "Gilouche"
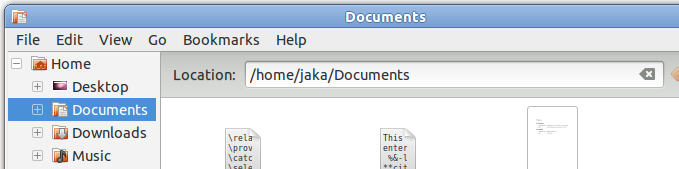
Show address/path in Nautilus
gsettings set org.gnome.nautilus.preferences always-use-location-entry true
Links
Piping with SSH
Remote TAR
Bash parameter substitution
Bash substitution
Create a Custom Debian Live Environment